Managing Connections
Supported Databases
Natively supported:MySQL
Full support including MySQL 5.7+ and MySQL 8.0+. Default port: 3306
MariaDB
Compatible with MariaDB 10.x and later. Default port: 3306
PostgreSQL
PostgreSQL 12+ with full feature support. Default port: 5432
Amazon Redshift
Redshift data warehouses via PostgreSQL wire protocol. Default port: 5439
CockroachDB
Distributed SQL via PostgreSQL wire protocol. Default port: 26257
SQLite
File-based databases, no server required
MongoDB
MongoDB 4.4+ with MQL shell queries. Default port: 27017
Redis
Redis 6.0+ with key-value browsing and CLI. Default port: 6379
Microsoft SQL Server
SQL Server 2017+ via FreeTDS. Default port: 1433
Oracle Database
Oracle 12c+ via Oracle Call Interface. Default port: 1521
ClickHouse
ClickHouse OLAP database via HTTP API. Default port: 8123
Cassandra / ScyllaDB
Cassandra 3.11+ and ScyllaDB 4.0+ via CQL native protocol. Default port: 9042
DuckDB
DuckDB embedded OLAP database. File-based, no server required
DynamoDB
Amazon DynamoDB via AWS SDK. NoSQL key-value and document database
BigQuery
Google BigQuery analytics warehouse via REST API. Service account or OAuth
Etcd
Etcd distributed key-value store via gRPC API. Default port: 2379
Cloudflare D1
Cloudflare D1 serverless SQLite database via Cloudflare API
libSQL / Turso
libSQL open-source SQLite fork. Works with Turso and self-hosted sqld via Hrana protocol
Creating a Connection
From the Welcome Screen
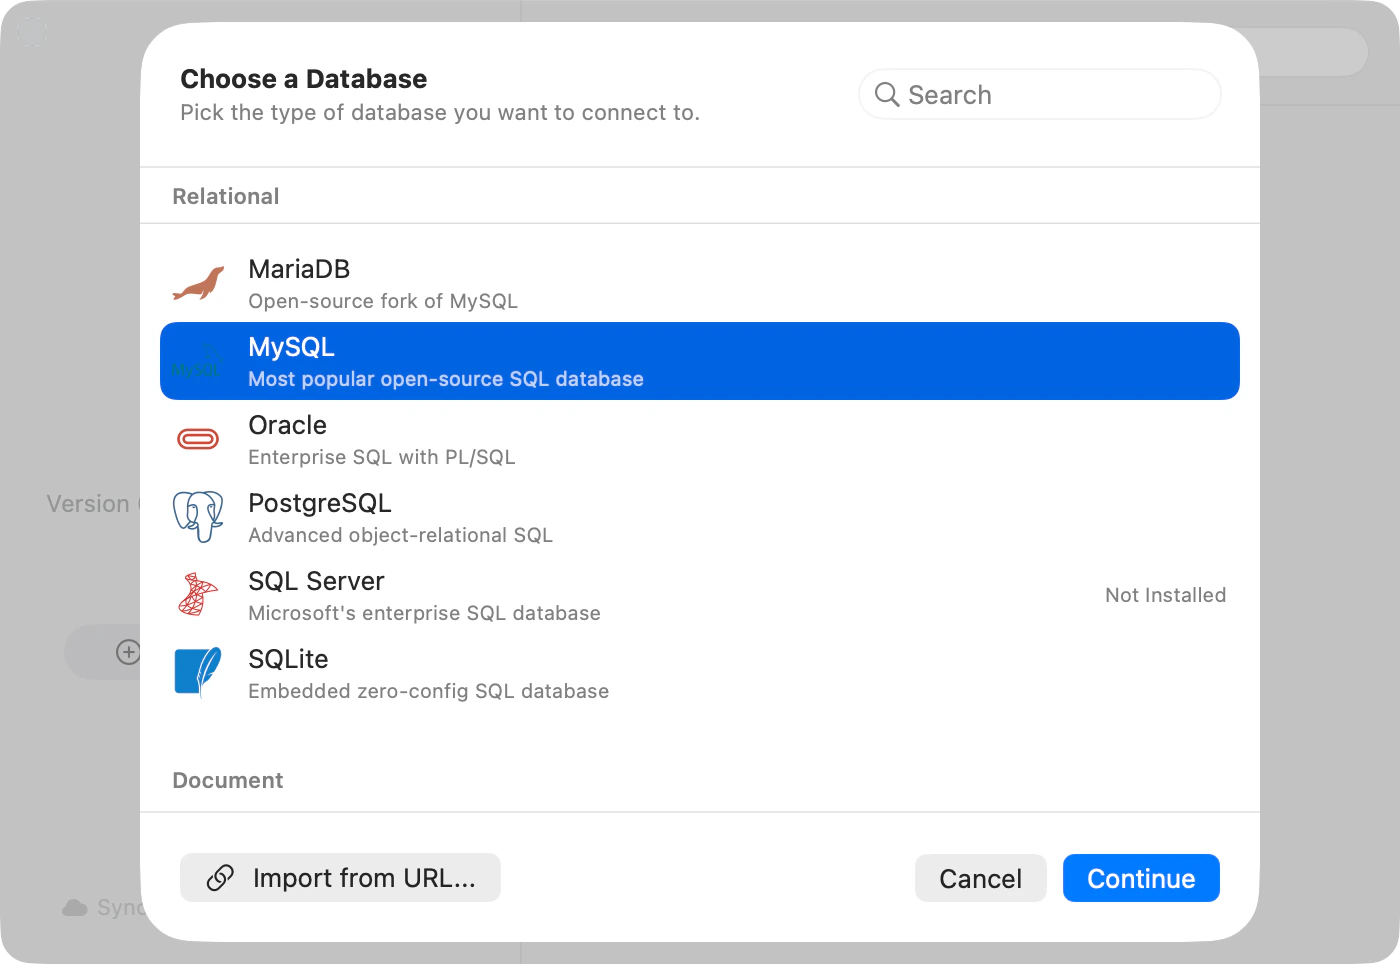
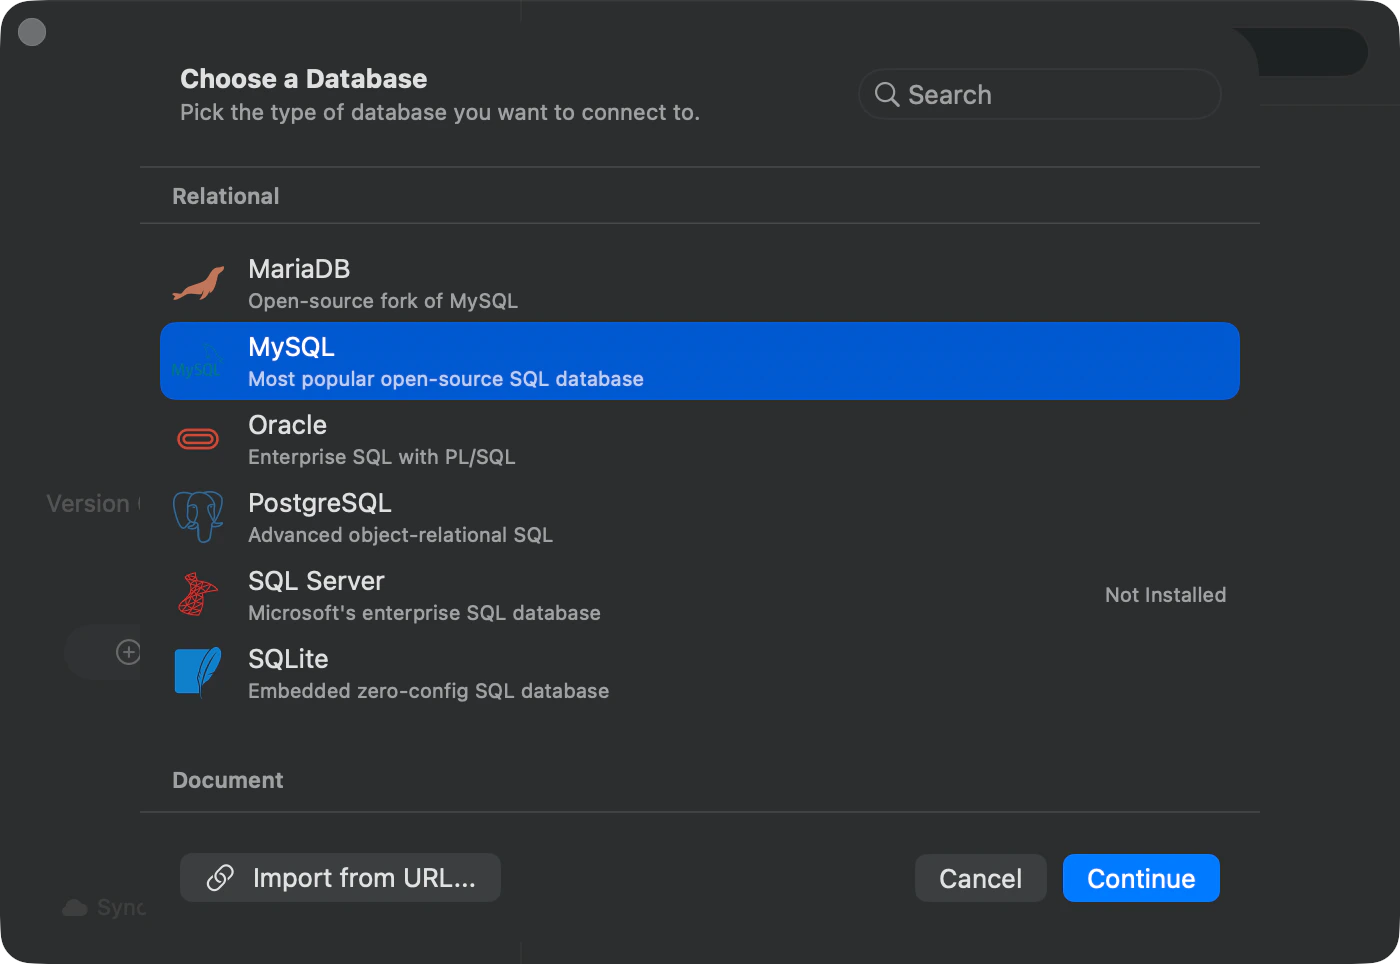
The Welcome screen appears on first launch or when no connections are active.- Click New Connection
- Pick a database type from the chooser sheet
- Fill in connection details in the form
- Click Test Connection in the General pane
- Click Save & Connect in the toolbar


From the Menu Bar
Create a new connection at any time:- File > New Connection (
Cmd+N)
From a Connection URL
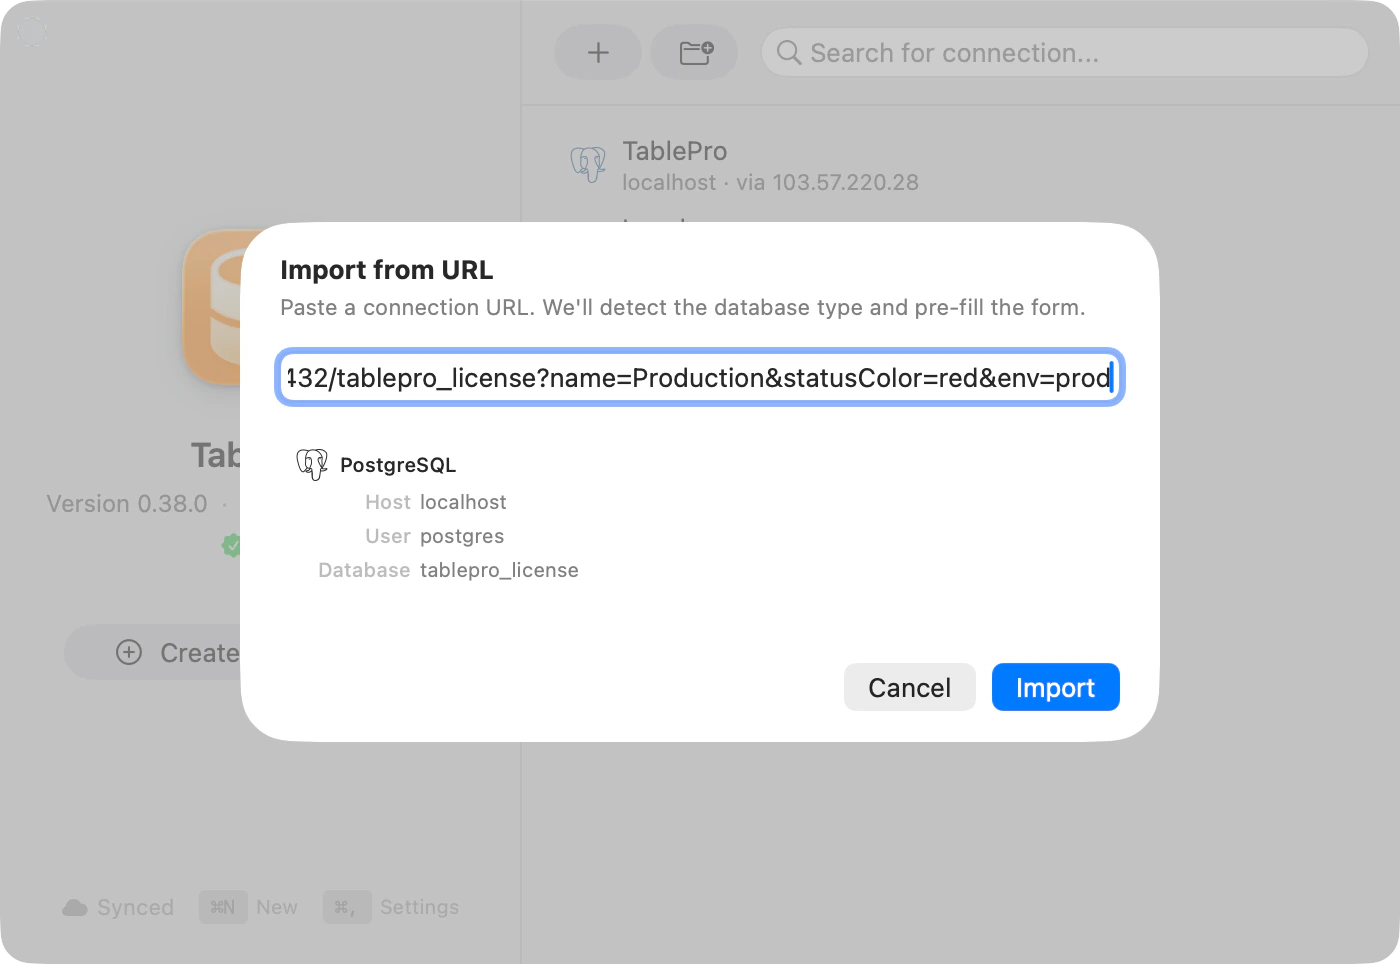
Paste a connection string and let TablePro fill in the form:- Click New Connection on the welcome screen
- In the chooser sheet footer, click Import from URL…
- Paste your URL. The sheet detects the database type and previews host, user, and database
- Click Import. The form opens with everything pre-filled
- Review and click Save & Connect

Connect Directly from a URL
Open a database URL from your browser or terminal. TablePro connects immediately, no form required. From a browser: paste the URL into your address bar and press Enter. From the terminal:postgresql, postgres, mysql, mariadb, sqlite, mongodb, mongodb+srv, redis, rediss, redshift, cockroachdb, cockroach, mssql, sqlserver, oracle, clickhouse, cassandra, and scylladb as URL schemes on macOS, so the OS routes these URLs directly to the app.
What happens:
- If a saved connection already matches the host, port, database, and username, TablePro reuses it
- Otherwise, a temporary session is created. Nothing is saved to your connection list
- The password from the URL is stored in Keychain for the duration of the session
This is different from Import from URL…, which opens the form so you can review and save. Direct URL opening skips the form entirely.
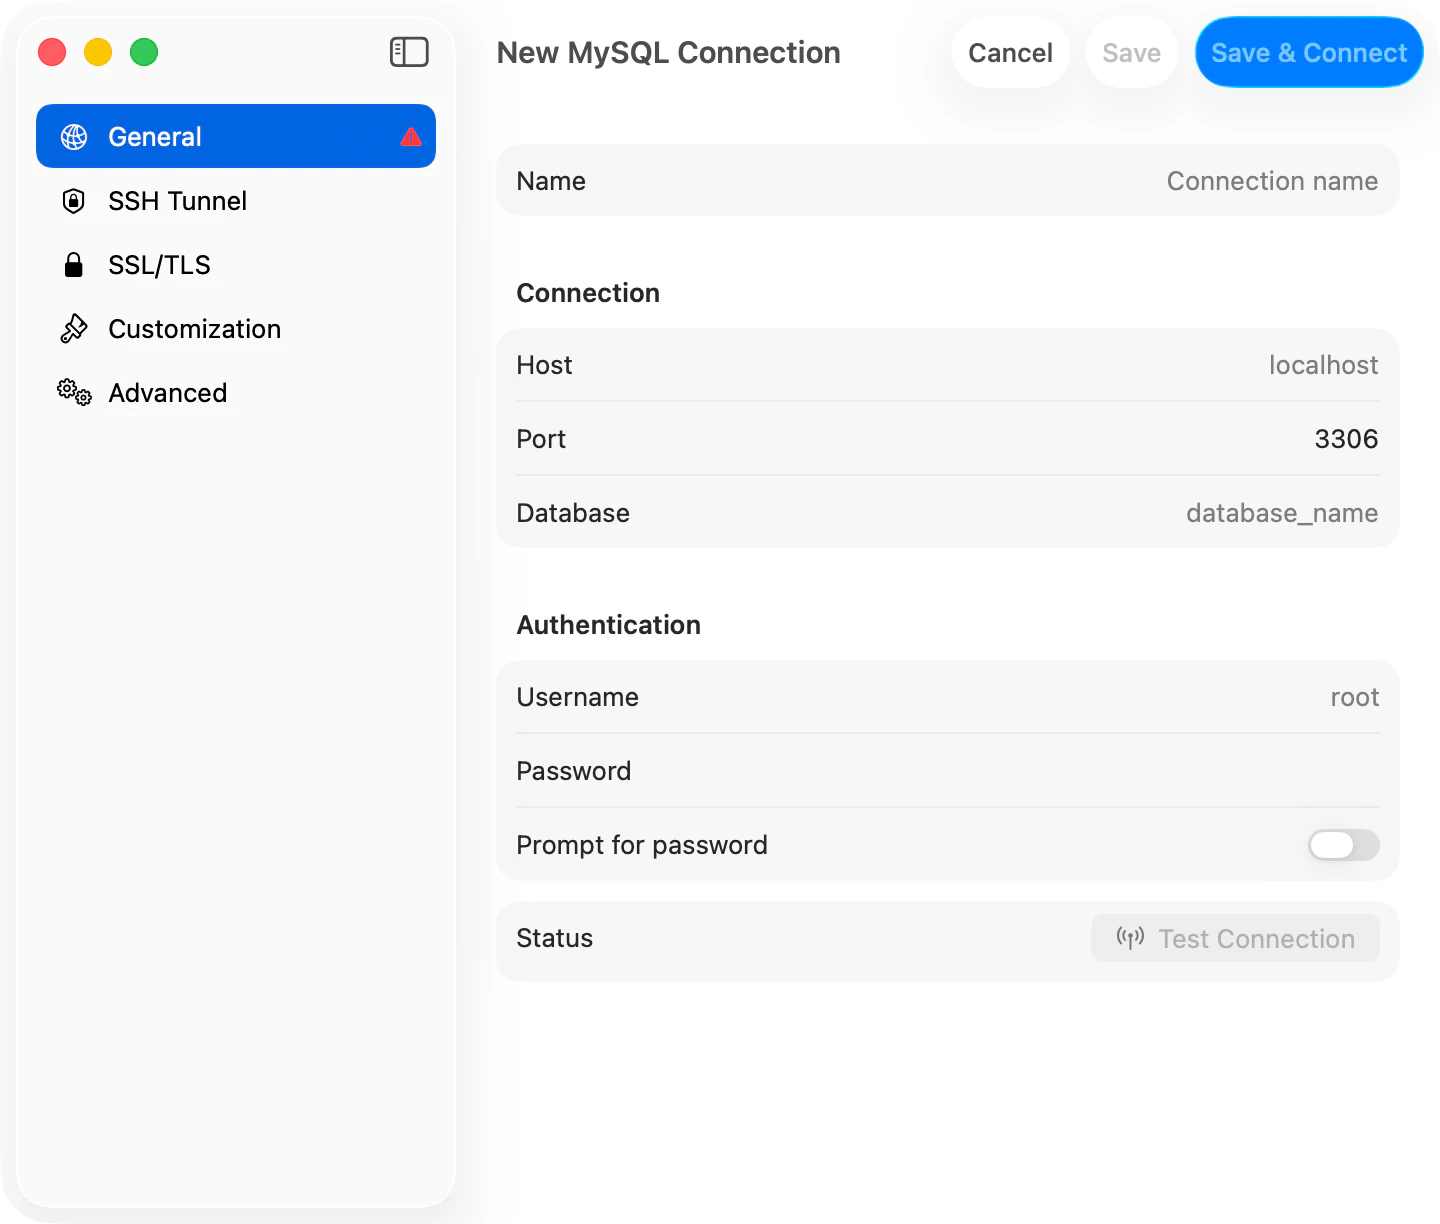
Connection Form Layout
The form is a sidebar with five panes. Drivers without networking (SQLite, DuckDB) hide the SSH and SSL panes.| Pane | Contents |
|---|---|
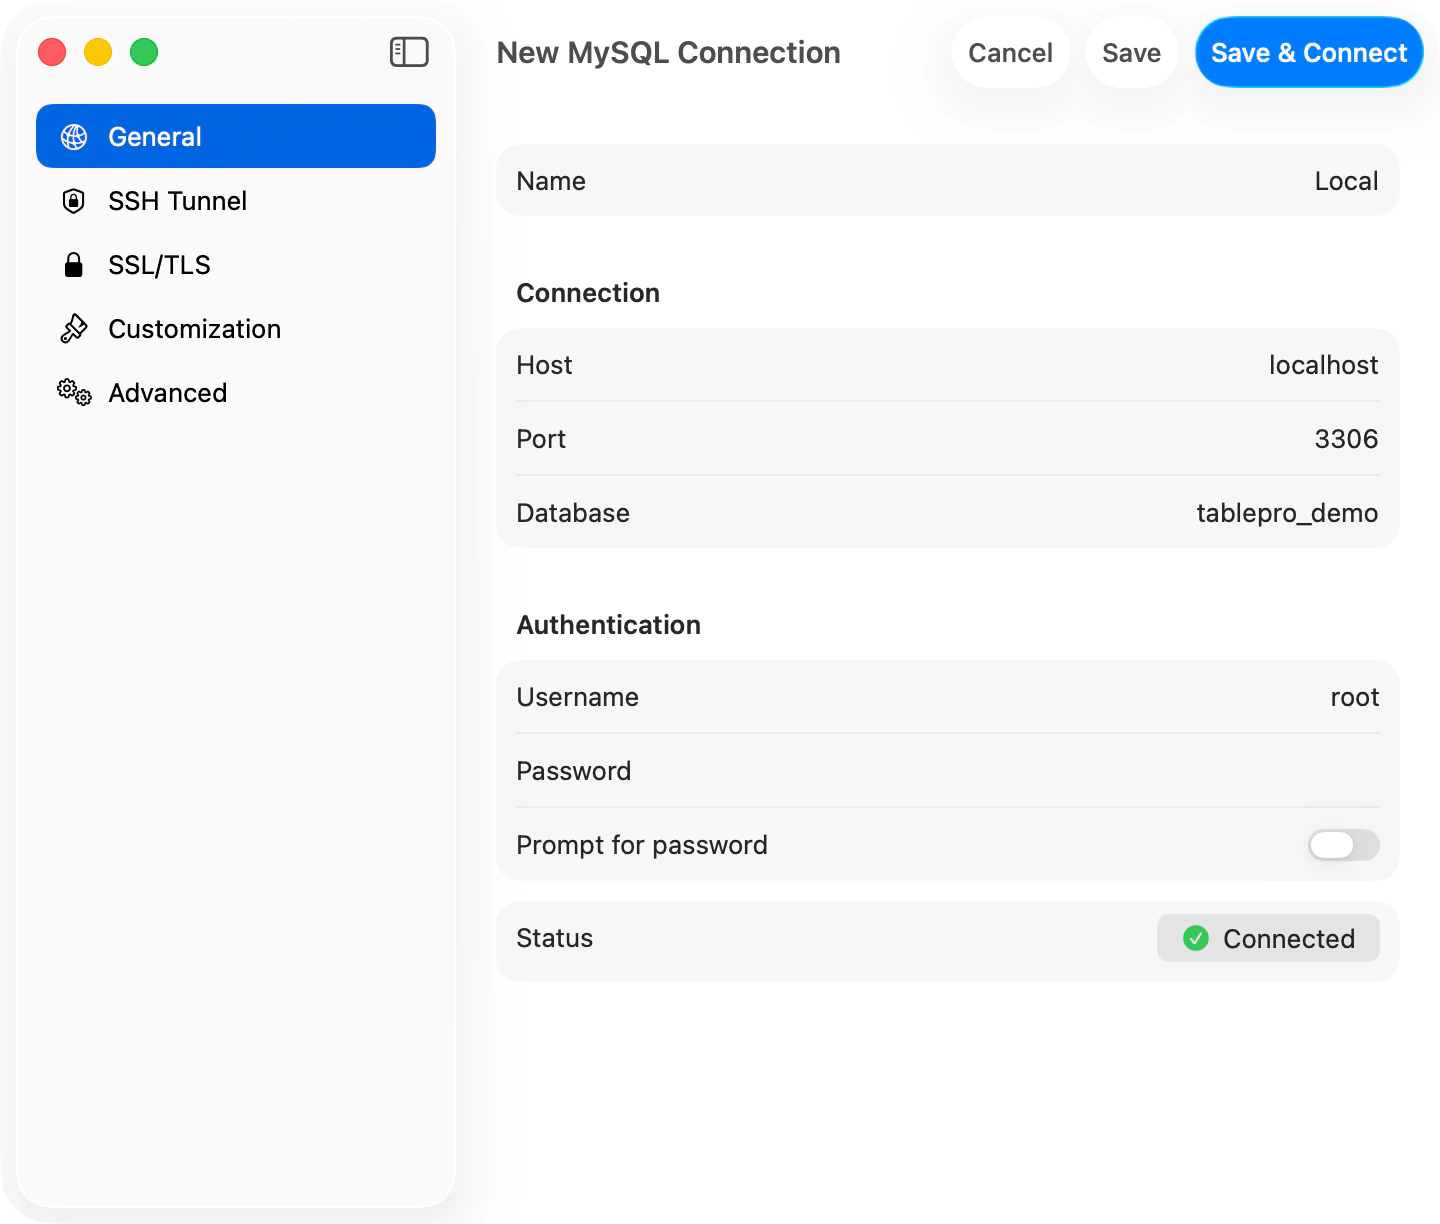
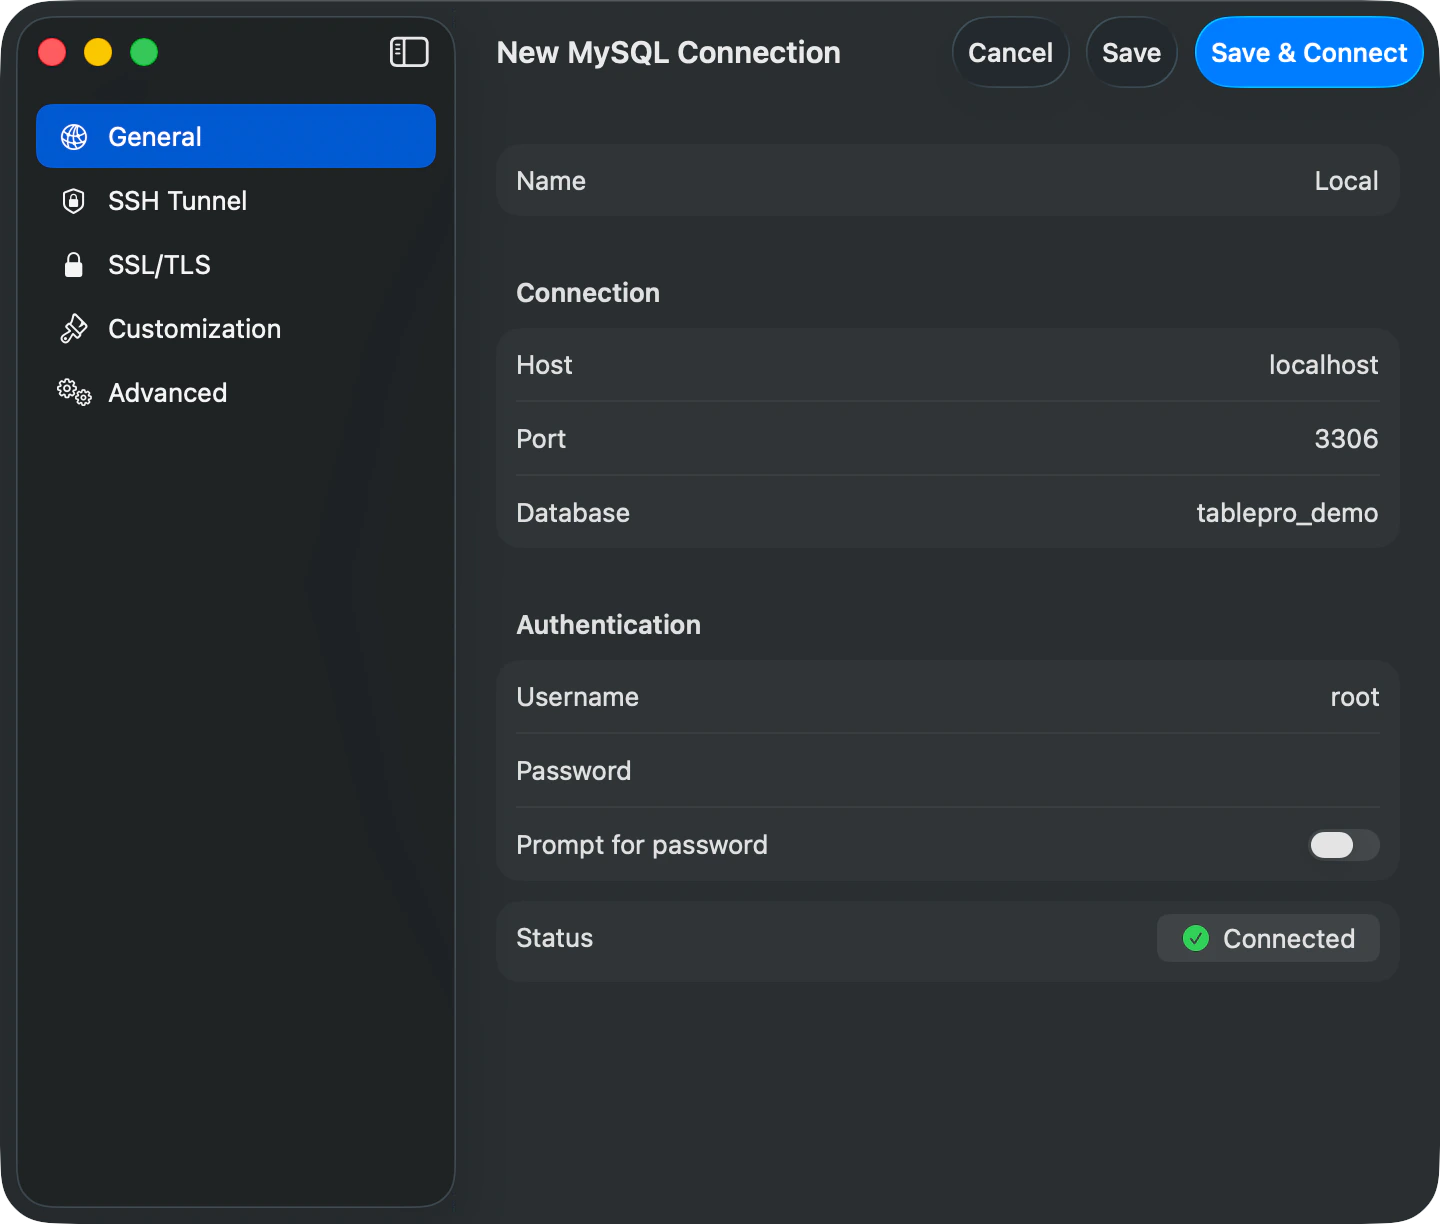
| General | Name, host/port/database, username, password, Test Connection |
| SSH Tunnel | Reach databases behind a bastion host |
| SSL/TLS | Encryption mode and certificates |
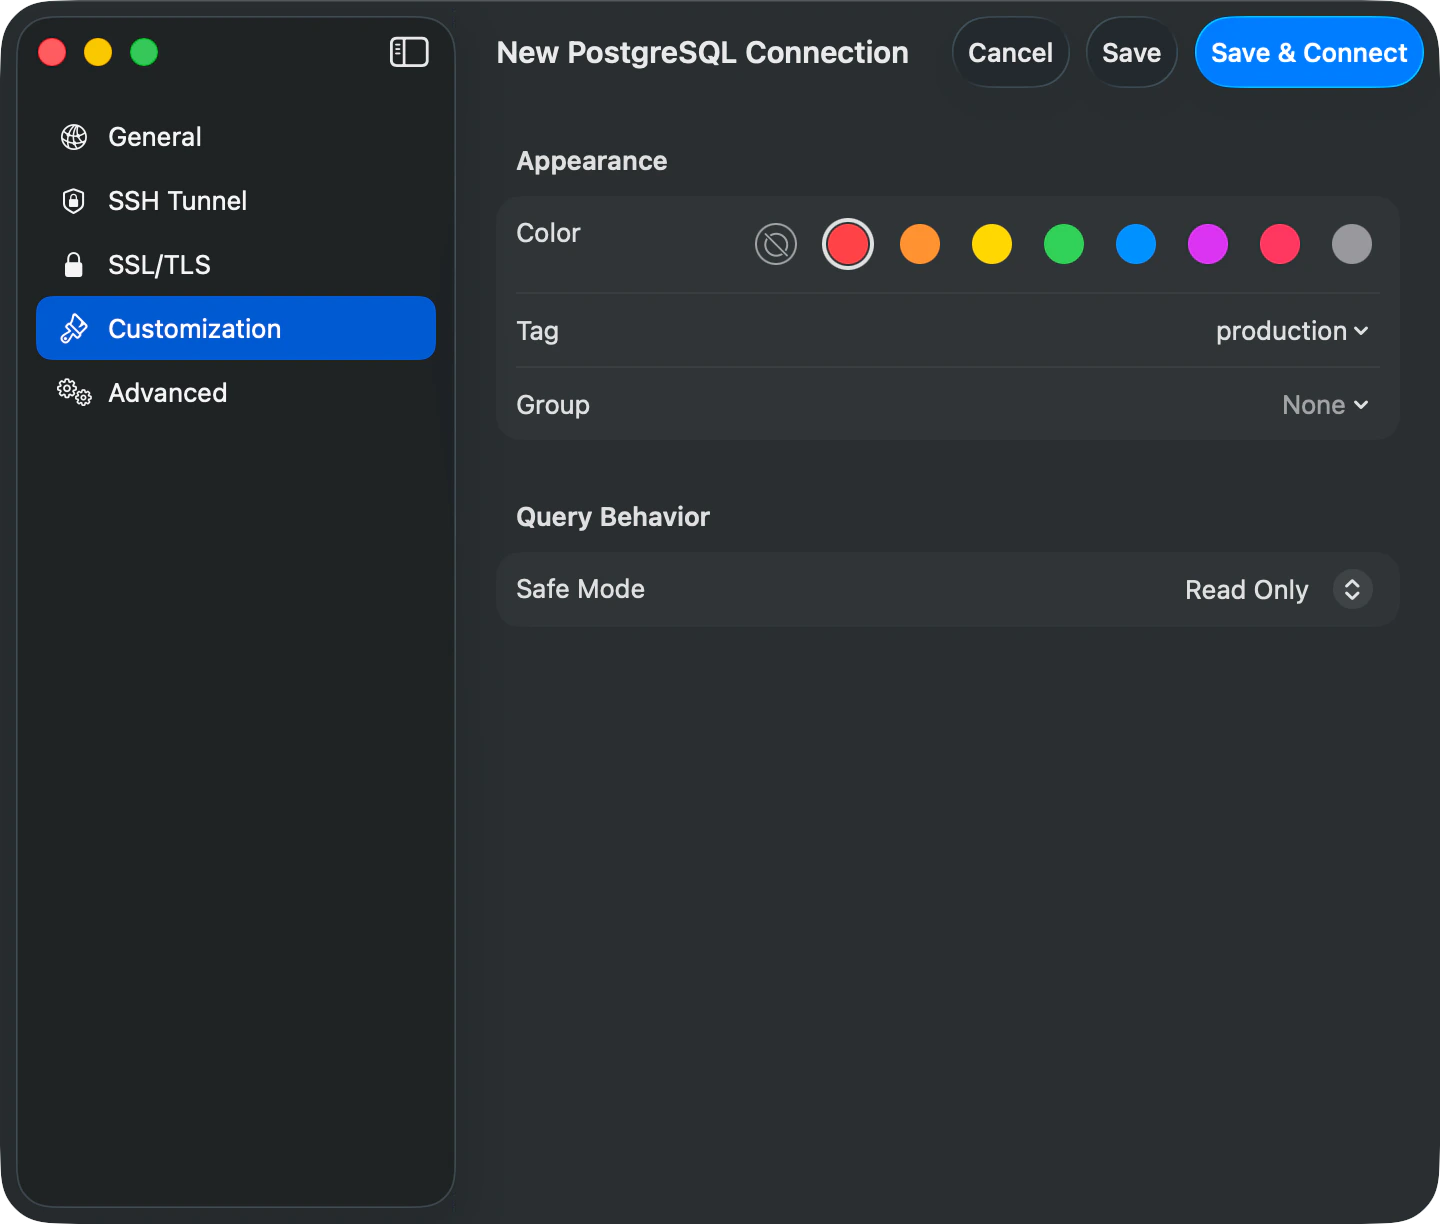
| Customization | Color, tag, group, Safe Mode |
| Advanced | Startup commands, pre-connect script, external access, plugin-specific fields |
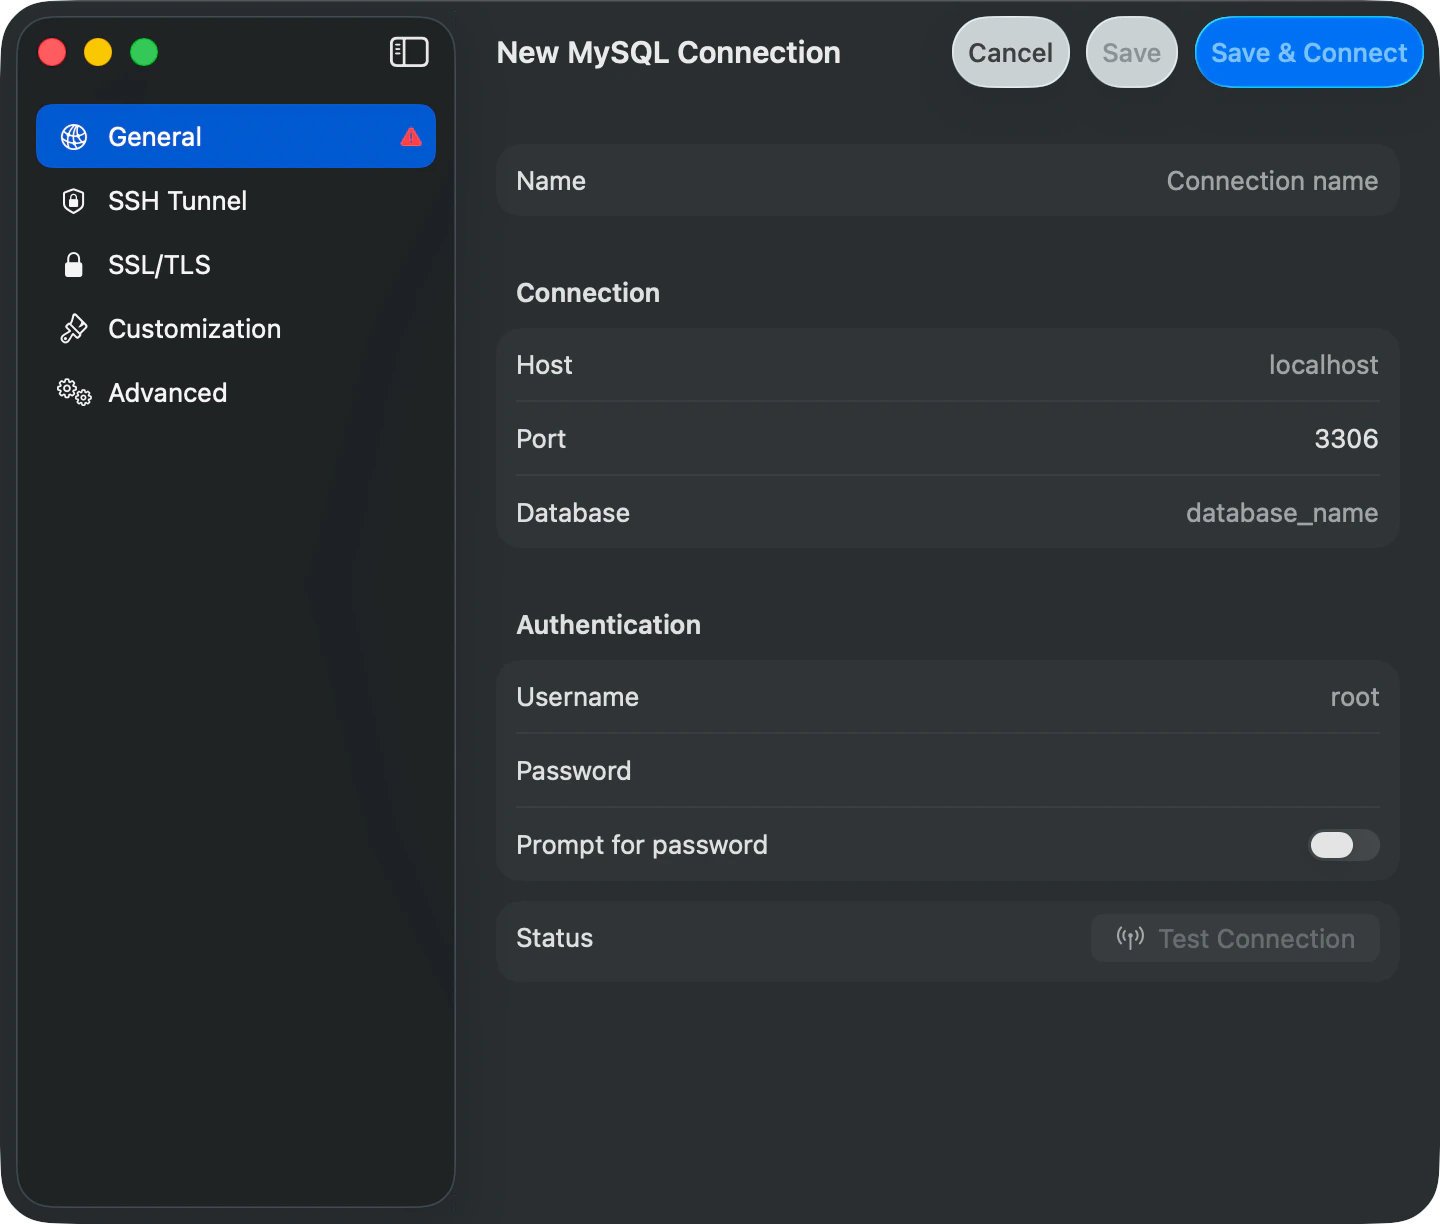
General
| Field | Description |
|---|---|
| Name | A friendly name shown in the connection list |
| Host | Server address. Defaults to localhost |
| Port | Server port. Pre-filled per database type |
| Database | Default database. Optional for MySQL/MariaDB; leave empty for service-level access |
| Username | Database username. Defaults to root (MySQL), postgres (PostgreSQL) |
| Password | Stored in Keychain |
| Prompt for password | Skip saving the password. TablePro asks for it on every connect |
| Use Password File | PostgreSQL only. Reads credentials from ~/.pgpass |
| Status | Test Connection button. Turns into a green “Connected” pill on success |
| Field | Description |
|---|---|
| File Path | Path to the database file |
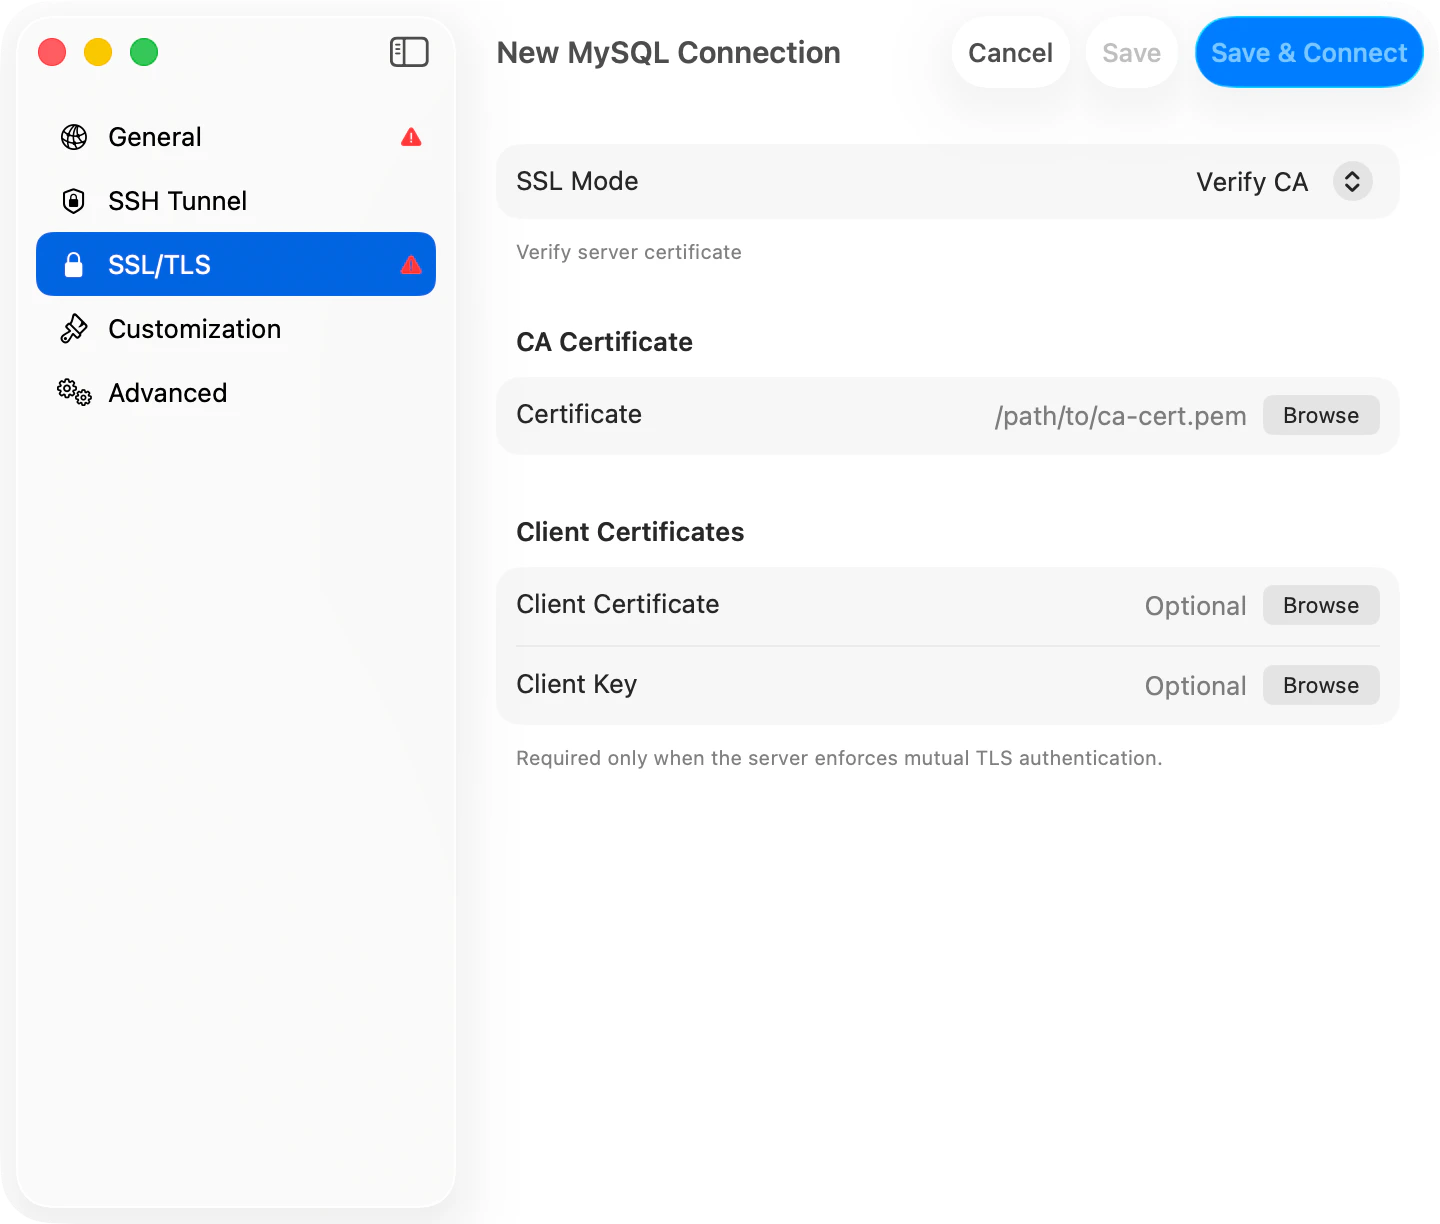
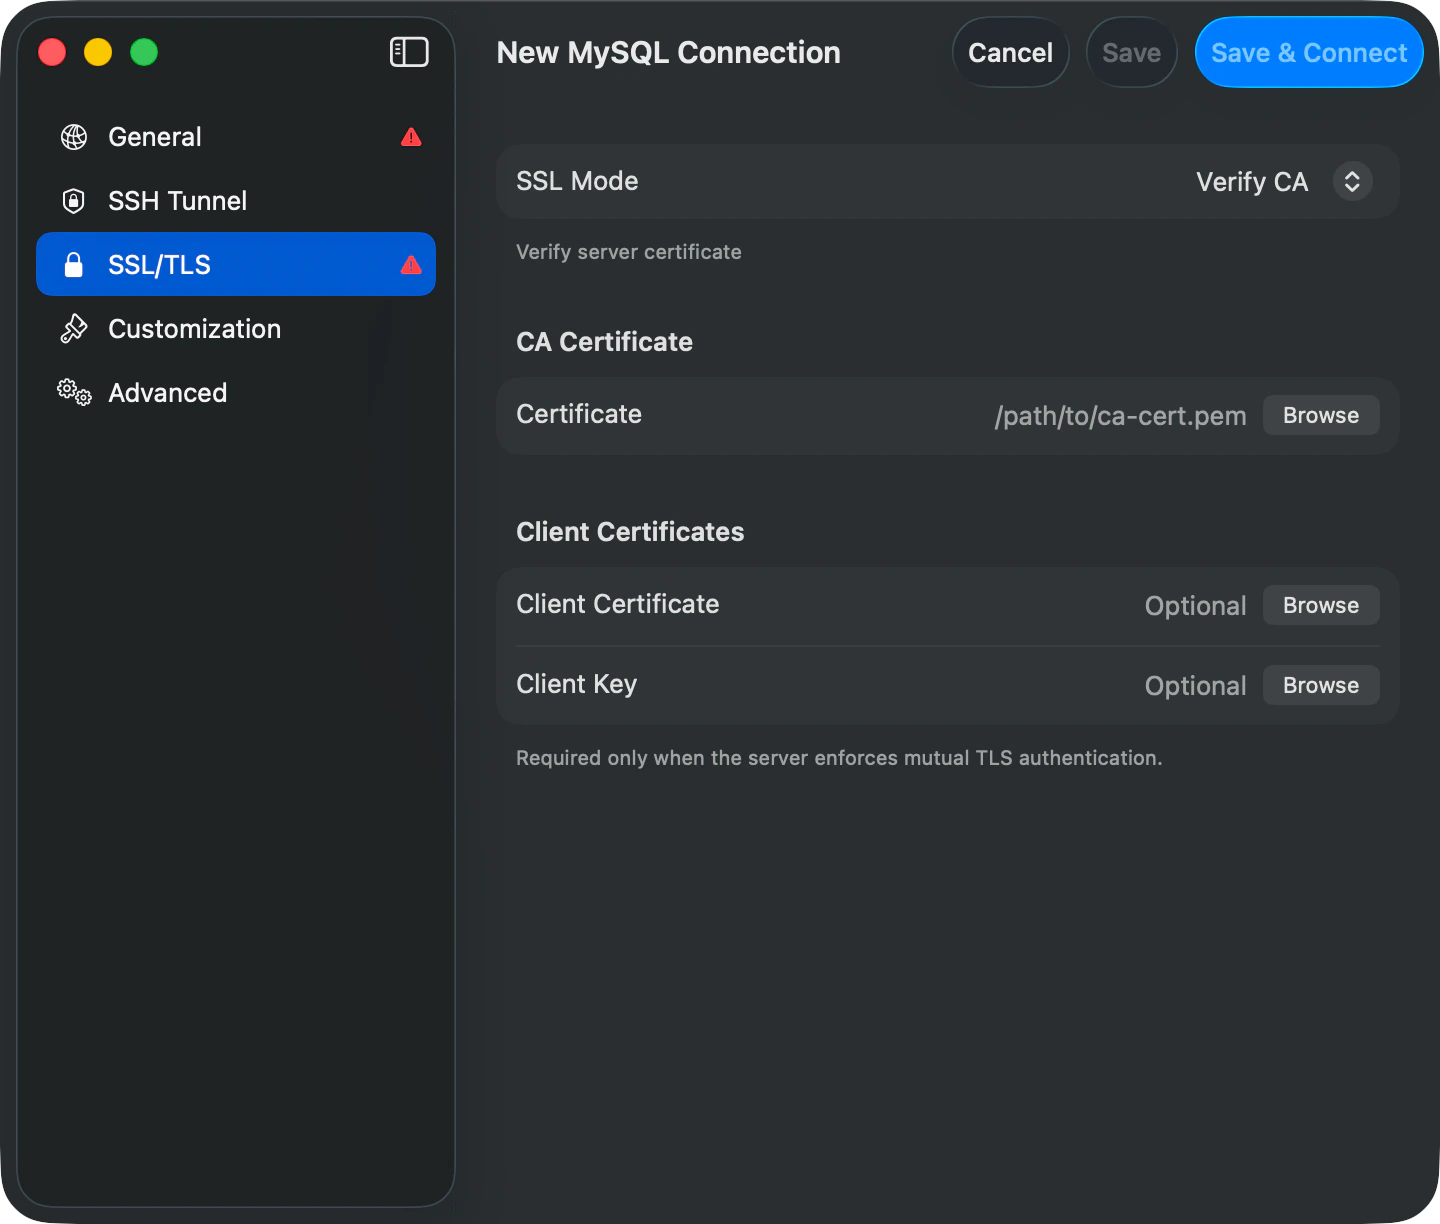
SSL/TLS
Available for network drivers that support encryption (MySQL, MariaDB, PostgreSQL, ClickHouse, MongoDB, etc.).| Field | Description |
|---|---|
| SSL Mode | Encryption level (see table below) |
| CA Certificate | CA file for Verify CA / Verify Identity |
| Client Certificate | Client cert. Required only for mutual TLS |
| Client Key | Client private key. Required only for mutual TLS |
| Mode | Description |
|---|---|
| Disabled | No encryption |
| Preferred | Use SSL if the server supports it, otherwise fall back |
| Required | Require SSL but don’t verify certificates |
| Verify CA | Require SSL and verify the server cert against a CA |
| Verify Identity | Require SSL, verify CA, and verify the hostname matches |
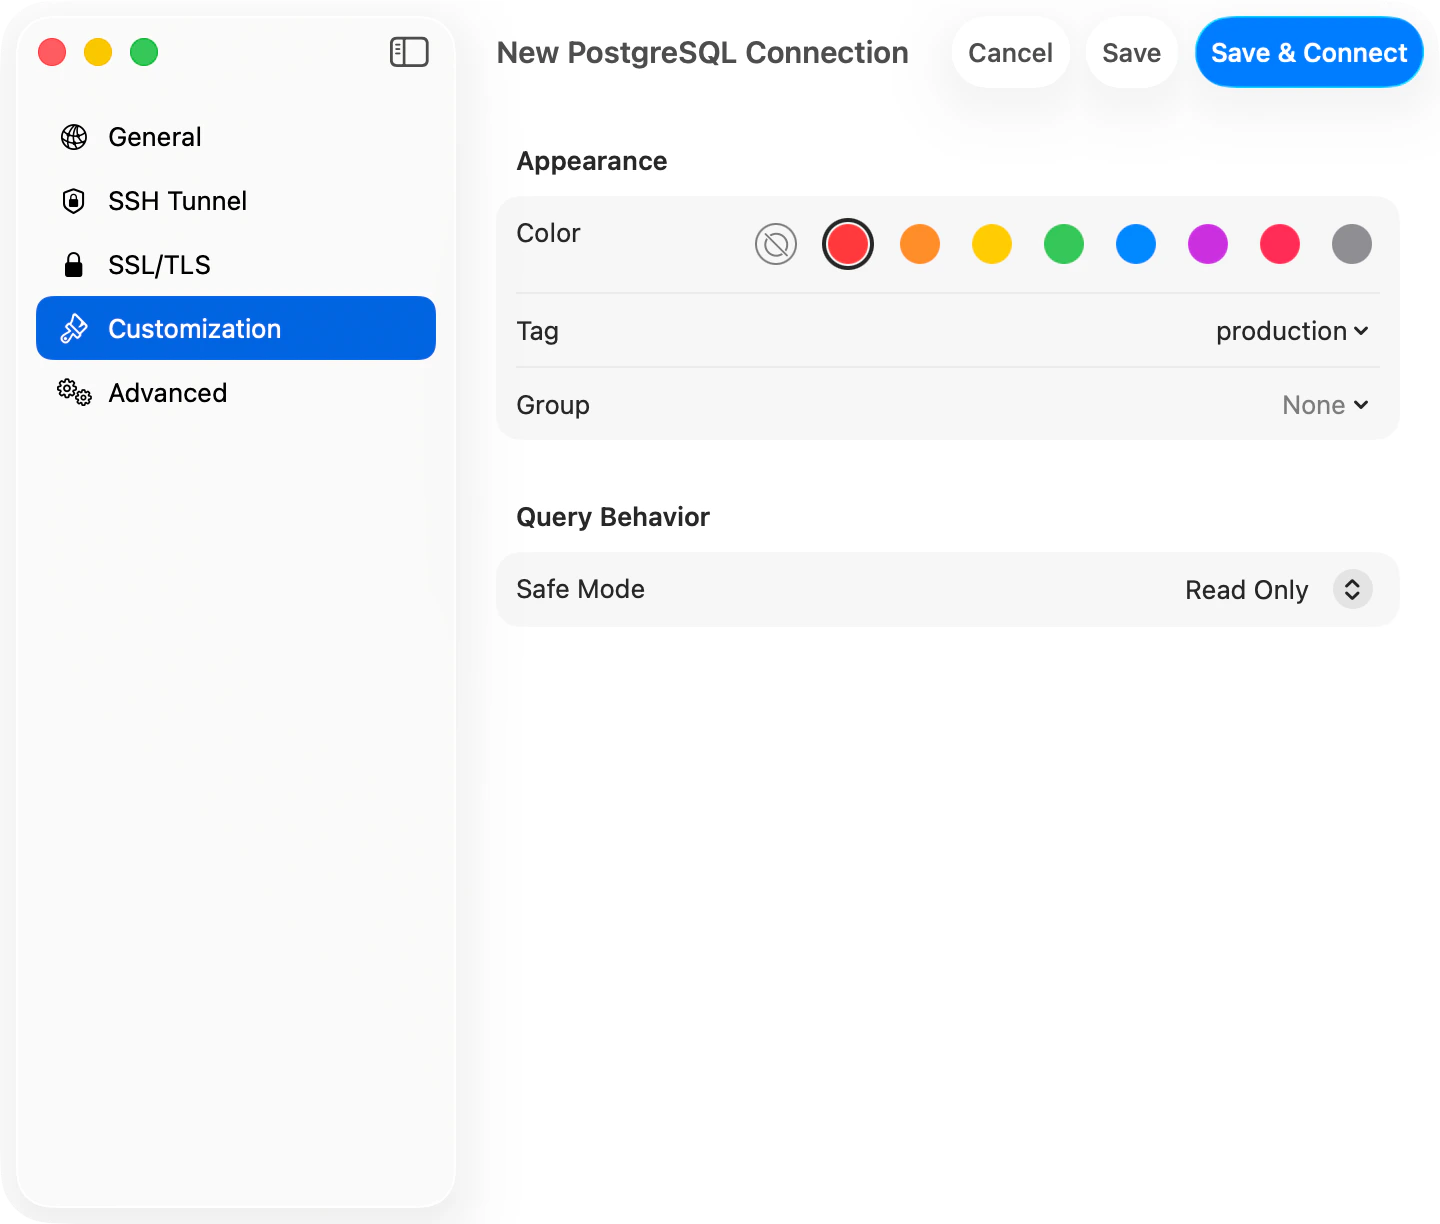
Customization
| Field | Description |
|---|---|
| Color | Tints the toolbar when connected. Useful for spotting prod vs. dev |
| Tag | A label that groups connections in the sidebar |
| Group | Folder for organizing connections. Supports nesting up to 3 levels |
| Safe Mode | Per-connection query gate. See Safe Mode |
Advanced
Open the Advanced pane for less common settings:| Field | Description |
|---|---|
| Startup Commands | SQL that runs after every connect. See Startup Commands |
| Pre-Connect Script | Shell script run before connecting. A non-zero exit aborts |
| AI Policy | Per-connection override for in-app AI agents |
| External Clients | Controls Raycast, Cursor, Claude Desktop, and other MCP clients: Blocked, Read Only (default), or Read & Write. Tokens can never exceed this level. See External API |
| Local only | Excludes this connection from iCloud Sync. See iCloud Sync |
| Plugin fields | Driver-specific options like MongoDB replicaSet, ClickHouse Secure |
Organizing Connections
Colors tint the toolbar when you connect (red for production, green for development). Tags group connections in the sidebar. Create connection groups by right-clicking in the connection list or using the folder icon. Groups collapse/expand with native macOS disclosure triangles and persist between sessions.Nested Groups
Groups support up to 3 levels of nesting. Right-click a group to create a subgroup, move it under another group, or delete it. Deleting a parent removes all subgroups. Connections inside are ungrouped, not deleted. The connection form shows the full hierarchy when picking a group.

Favorites
Star a connection to keep it within reach. Hover any row in the welcome list and the star button appears on the right; click it, or right-click the row and choose Add to Favorites. Multi-select to favorite many at once. Favorited connections gather in a Favorites section at the top of the list, sorted alphabetically. The same connection still appears in its group below, so you can keep your taxonomy intact while pinning the few you reach for daily. Click the filled star (or right-click and pick Remove from Favorites) to unstar. Favorites sync through iCloud along with the rest of your connection settings. Connections you’ve excluded from iCloud sync keep their favorite status on the local device only.Quick Connection Switching
Switch connections from the toolbar:- Click the connection name button in the toolbar, or press Cmd+Control+C
- A popover shows your active sessions and saved connections
- Type to filter, use the arrow keys to move, and press Return to switch, or click any connection
- Click Manage Connections… to open the full connection manager
Switching Databases
One connection covers every database on the server. Switch with Cmd+K, or click the database name in the toolbar.Service-level connections
Leave the Database field empty when creating the connection. Works for MySQL, MariaDB, MongoDB, SQL Server, and ClickHouse. The sidebar lists every database your user can access. PostgreSQL and Redshift need an initial database. Connect topostgres (Redshift: dev), then use Cmd+K to switch.
Filtering the database tree
When the sidebar is in tree layout, a server with many databases can get noisy. Click the filter button in the sidebar footer and check the databases you want to see. The tree then shows only those; with nothing checked, it shows all. A search box helps with long lists, and the footer shows how many of the total are visible. The choice is saved per connection. If a filtered database is later dropped, the tree shows a Show All button to clear the filter.

Dock Menu Quick Connect
Right-click the TablePro icon in the Dock and select a saved connection under Open Connection. If it fails, you’ll fall back to the Welcome screen.Creating Databases
To create a new database:- Right-click on the connection in the sidebar
- Select Create Database
- Enter the database name
- Choose charset and collation (MySQL/MariaDB)
- Click Create
Database creation requires appropriate user privileges on the server.
Testing Connections
Before saving a connection, test it:- Fill in all required connection details
- Click Test Connection
- Wait for the result:
- Green checkmark: Connection successful
- Red X: Connection failed (see error message)
Connection Health Monitoring
TablePro monitors active connections and auto-recovers from drops.Automatic Health Checks
For MySQL, MariaDB, and PostgreSQL, TablePro pings (SELECT 1) every 30 seconds. SQLite is file-based and skips health checks.
Auto-Reconnect
When a connection drops, TablePro reconnects with exponential backoff:- Attempt 1: waits 2 seconds, then reconnects
- Attempt 2: waits 4 seconds, then reconnects
- Attempt 3: waits 8 seconds, then reconnects
Manual Reconnect
Click the Reconnect button in the toolbar to retry manually. For SSH connections, this also recreates the tunnel.SQLite connections are file-based and don’t require health monitoring or auto-reconnect.


Startup Commands
SQL statements that run automatically on every connection. Configure startup commands in the Advanced pane of the connection form. Enter one SQL statement per line.Common Examples
Startup commands run on every connection, including auto-reconnects.
Editing and Deleting Connections
Right-click a connection to edit or delete it. Changes take effect on the next connection. Deleting removes the saved settings only.Backup and Restore
Connections are stored in~/Library/Preferences/com.TablePro.plist. Passwords are in the macOS Keychain. Copy the .plist file to back up. You’ll need to re-enter passwords after restoring since Keychain entries don’t transfer.